So I’ve been obsessing over my kids’ silhouettes lately. I just made two prints and framed them in our dining room and after scrolling through my Christmas Pinterest list (yes, I know it’s a little early to think about Christmas but with two November kids birthdays, I need to be prepared for Christmas gifts), I came across a beautiful silhouette ornament from Paloma’s Nest. Feeling frugal, I can’t fork over $40 for an individual ornament (although I sure would love to!) and figured there has got to be a way I can make this.
So this is how I made my version:
1. Using a white polymer clay, knead and roll it flat with a rolling pin (or in my case, my son’s playdoh roller).
2. Cut out whatever shape your heart desires with a cookie cutter (these are great to have so you have multiple sizes for multiple projects). I think a circle is best to go along with the classic look but you could also try an oval.
3. Punch a hole in the top of the shape with a normal drinking straw (so the ornament can actually be hung)
4. Follow the baking instructions on the packaging. For sculpey, the clay should be placed on a glass dish and baked at 275°F for 15 minutes for every 1/4 inch of clay thickness. My oven runs hot but I baked mine for about 7 minutes.
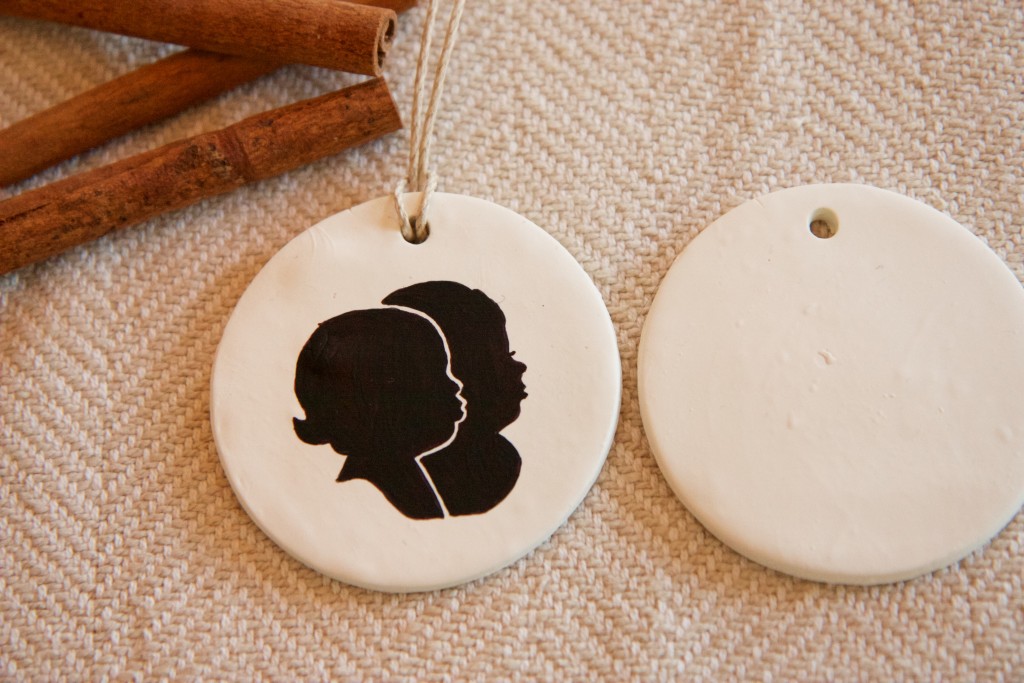
5. Using a fine tip sharpie, trace the profiles of your children (all that’s needed is a profile picture of your child, printed and cut out) onto the ornaments.
6. Follow up with chalky finish paint. I recommend filling in the silhouette with the sharpie acting as a primer before painting but if you’d rather not, it will still turn out. You’ll just need a few more coats of paint (which dries crazy fast).
7. I used regular twine that I had lying around to hang the ornaments but you could use bakers twine or ribbon, and slip it through the hole you made with the straw.
I already had the clay, cookie cutters and twine on hand so this project only set me back $6 for the paint. Not so bad, huh?
This has got to be one of the easiest, cheapest (and quickest) crafts I’ve done. I know it isn’t perfect and it doesn’t look as good as the $40 one but I think it’ll work out just fine for the grandparents who don’t get to see the kids as often as we’d all like. The great part about this craft is you could use a different paint color and completely change the “feel” of the ornament. Hot pink? Gold? Ugh, I’m in love with the possibilities!
Affiliate Link Disclosure:
This post may contain affiliate links which means that when you click links, in most (not all) cases I will receive a referral commission at no cost to you should you choose to buy the items I recommend. I either own or want to own the products I have affiliate links to so I have no doubt you’ll love them too!